By Koaw - November, 2020
STEP 1: So you want to get better at identify sunfishes? Let’s get started by learning just nine things: Four directionalities and five body parts.
The adjacent video summarizes all that you should know as well as many other anatomical features on sunfishes.
Learning the names and locations of a handful of body parts as well as the basic directionalities is the best place to start. You don’t need to learn all the body parts but I’ll emphasize which features are most important to get down. The illustrations and accompanying definitions below will easily let you visualize what is necessary to learn.
Note: The opercular flap will not be visible on most larvae (very young specimens) and may be faded on juveniles.
This is less intimidating than it may seem, trust me. For anyone who is a fisher, or at least has an interest in better understanding fishes, I guarantee that if you can memorize the four basic anatomical directionalities and a handful of anatomical terms (body part names) then this knowledge will help you understand not just what my guides are talking about (though I try to simplify things) but also what your other field guides are talking about. This will help you better understand more complex articles in fishing magazines, topics on fishing websites as well as the information in your local fishing regulations. It’s a practical tool to have in your toolbox of knowledge, just like it’s practical to have a diversity of lures in your tackle box to gain advantages in different water settings.
Lepomids are found in freshwater systems, not in saltwater; however some lepomid populations may be found in brackish water.
LEARN THE FOUR BASIC DIRECTIONALITIES
In the graphic below, I have supplied more information than you need to know (as of now.) Focus on these directionalities: DORSAL SIDE, VENTRAL SIDE, ANTERIOR END & POSTERIOR END.
ANTATOMICAL DIRECTIONALITIES: The four most basic anatomical directionalities are dorsal, posterior, ventral and anterior. These are somewhat like the cardinal directions (north, east, south and west). The anatomical directionalities allow for understanding where a feature is being described on a fish and are often used for comparing the position of a feature against another feature. And guess what? These descriptors are applicable to ALL FISHES in the world as well as to most other animals in zoology.
Anterior describes the direction towards to the front. The anterior region of a sunfish is also the cranial region where the head, mouth and snout exist. In the supporting image, it is correct to say that the most anterior edge of the upper lip is marked with a “1”.
Posterior describes the direction towards the rear. The posterior region of a sunfish is also called the caudal region as that is where the caudal fin, or tail fin, is located. In the supporting image, it is correct to say that the posterior edge of the maxillary is marked with a “2”.
Dorsal describes the direction towards the back, or spinal region. Both the soft rayed and spinous dorsal fins are dorsally seated on lepomids. In the supporting image, it is correct to say that the premaxillary is dorsal to the dentary.
Ventral describes the direction towards the belly. The breast, belly, pelvic fins, anal fin, anus and urogenital opening are all located on the ventral region of sunfishes. In the supporting image, it is correct to say that wavy blue streaks exist both ventrally and anteroventrally to the eye.
LEARN FIVE BODY PARTS
ANATOMICAL FEATURES OR BODY PARTS: On the accompanying graphics I’ve included all the parts that I feel are quite necessary to learn for fully understanding the guide. However, I selected perhaps the 5 most important body parts to know for quick identification purposes.
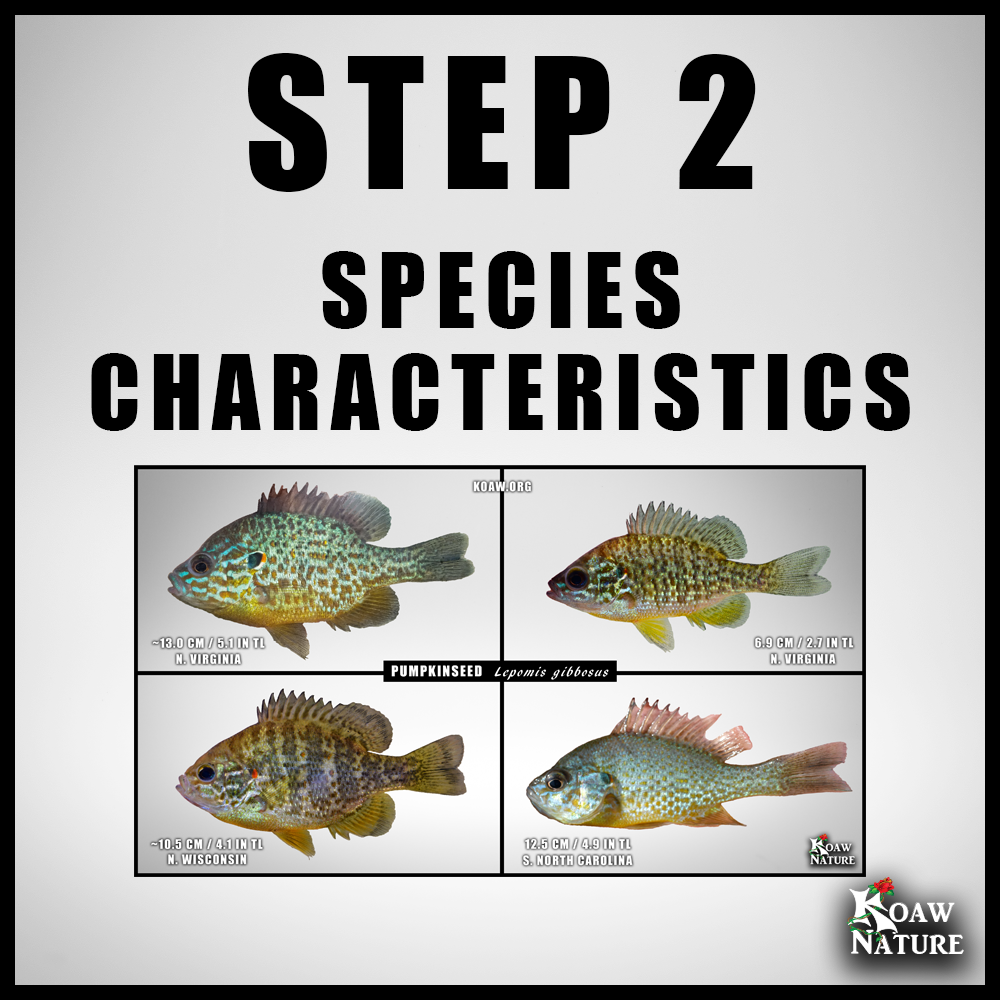
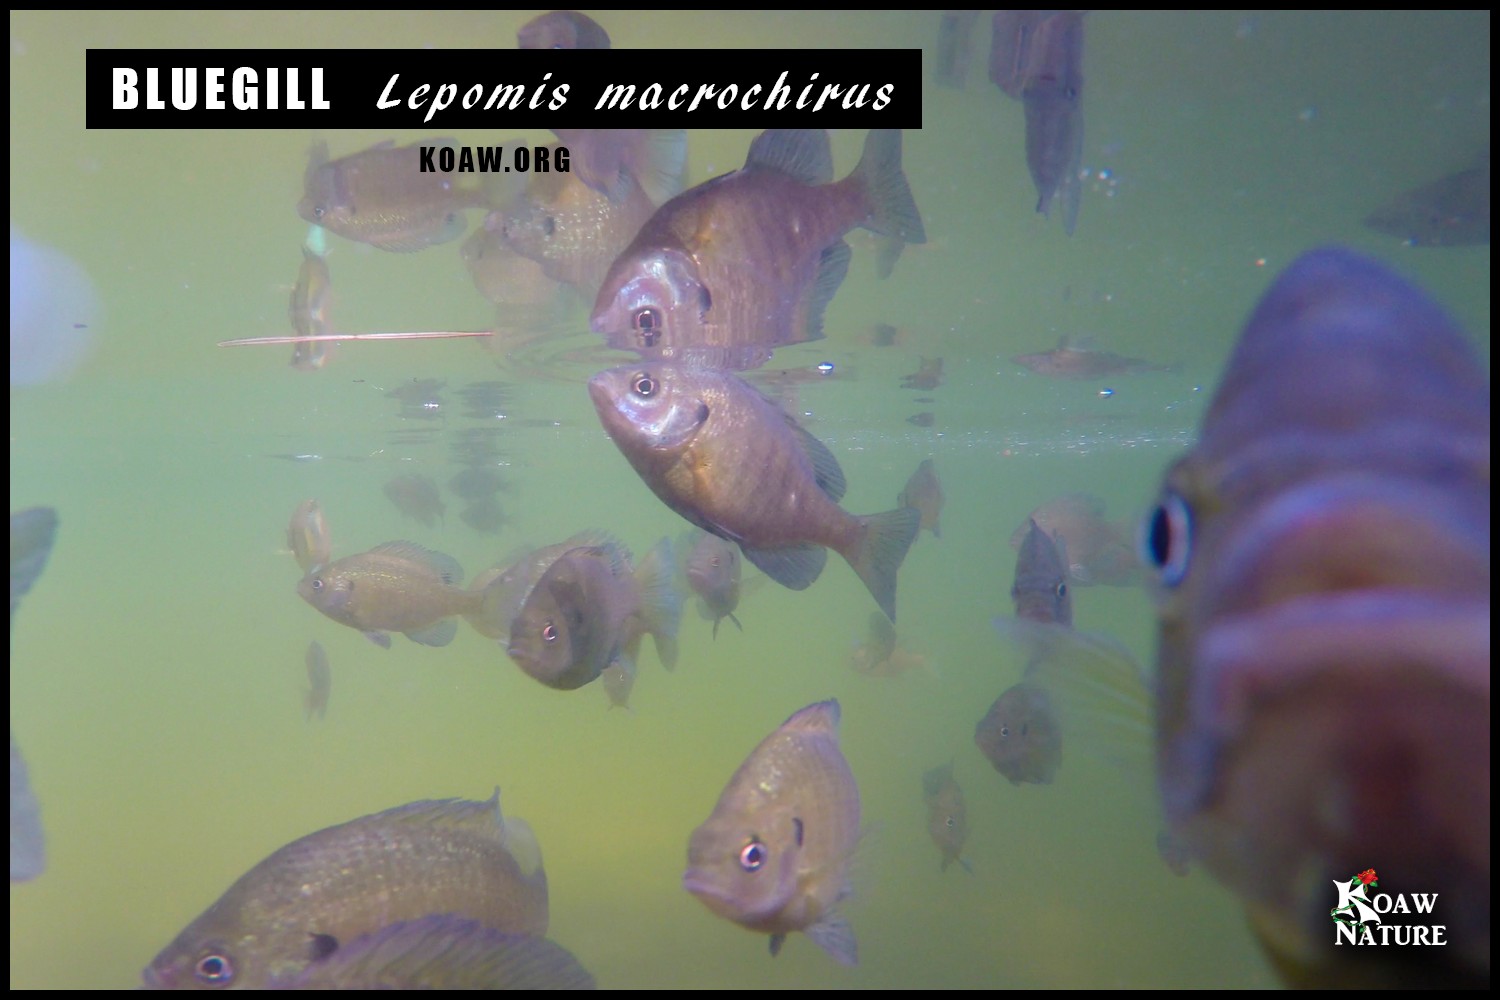
Opercular flaps belong to the following species: A. The longear sunfish (L. megalotis). B. The bluegill (L. macrochirus). C. The dollar sunfish (L. marginatus). D. The pumpkinseed (L. gibbosus).
1. Opercular flap or “ear flap” – The opercular flap is one the best features to analyze when identifying sunfishes. This fleshy extension exists on the back of the head and often extends over the body, or more specifically, it exists on the dorsoposterior (dorsal + posterior) end of the gill plate, aka the gill cover or operculum. There are two ear flaps in total, one on each lateral side.
When you analyze the ear flap, take notice of the size. Is the ear flap longer than the length of the eye or is it short? Take notice of the angle of the ear flap when the fish lies flat. Is it pointing upwards or is it more horizontal? Take notice of the color on the edging. Is the edging all black? Do other colors exist? If so, are they faint or do they form a bright color spot? Or both? Are there any color spots not on the edging?
The supporting image shows four different specimens, each of a different species and each with very different opercular flaps. How would you describe each flap?
2. Pectoral fin – Examining the length and pointiness of the pectoral fin will be the next best feature to examine. Only three species of lepomids have long and pointed pectoral fins that will usually extend past the front of the eye if bent forward: bluegill (L. macrochirus), pumpkinseed (L. gibbosus) and redear sunfish (L. microlophus). The green sunfish (L. cyanellus) has a very short and roundly pectoral fin that hardly ever passes the posterior margin of the pupil if bent forward.
Click on the image to enlarge.
There are two pectoral fins, one on each lateral side. Each pectoral fin has a number of soft rays that give the fin its structural form. Counting these rays is also a beneficial method for identification purposes. The accompanying illustration shows how to make these counts. Also keep in mind that these counts vary within a species, and at times, vary on the same individual. E.g. – The northern sunfish (L. peltastes) typically has 12 pectoral rays in 1 pectoral fin. Sometimes this count will be 11 or 13. A northern sunfish specimen I captured in Ohio had 12 rays on one side and 13 on the other.
Left maxillary of a green sunfish is highlighted in green.
3. Maxillary (maxilla) – The maxillary is a posterior bone of the upper jaw that looks like a triangular bean with a small sprout from a lateral view. The guide will compare the maxillary’s posterior edge (the very back edge) to the position of the eye and/or pupil. (Yes, technically this involves a number of parts but I’m assuming you could identify the mouth, pupil and eye before you even caught your first fish!)
There is a strong correlation between the mouth size and extension of the upper jaw so when this guide refers to a small mouth it is also implying the posterior end of that maxillary does not usually extend past the anterior edge of the eye. There are two maxillae, one on each lateral side.
The warmouth (L. gulosus) and the green sunfish (L. cyanellus) have the largest mouths of the sunfishes while the bluegill (L. macrochirus), pumpkinseed (L. gibbosus) and redear sunfish (L. microlophus) have the smallest mouths.
Click to enlarge.
4. Operculum, gill plate or gill cover – The gill plate is posterior on the head and covers the gill arches. There are two gill plates in total, one on each lateral side. This gill plate is composed of four bones that collectively are called the operculum. The most anterior bone is the preopercle that rests above the interopercle. Posterior to the interopercle is the subopercle which rests under the largest bone of the operculum, the opercle. The opercular flap (ear flap) rests on the end of the opercle.
The gill plate is important to know as it often has certain streaking colors or spots located atop this region that are unique to certain species. Also, lifting this gill plate allows access to view the gill rakers discussed next.
5. Gill rakers – The gill rakers are boney extensions that exist on the gill arches and are primarily used for retaining food organisms when feeding. The rakers are white and vary in size, shape and distribution along the arches. Different species may have very different sizes on the gill arches.
For the purposes of this guide, we want to just look at the longest rakers that we can on the 1st gill arch without hurting/killing the fish. This is easily done by sliding one thumb under the gill plate and using another finger to gently press down to on the arches to spread out the rakers. Be gentle! The red filaments are how the fish breathes, among other things, and these filaments bleed easily. Do not apply excessive force or cut these filaments as it could be perilous to the fish.
I suggest that you begin analyzing the rakers on most fish that you catch so that you can gain the muscle-memory action of how to quickly do it as well as gain the familiarity of the rakers’ appearances for each species and the variance that exists within each species. (I have taken photos of gill rakers on the 1st gill arch for all lepomids; they are on the individual species pages as well as on “Koaw’s Quick Cheat Sheet” in Step 5.)
READY TO MOVE ON?
Okay! You should understand what dorsal, ventral, anterior and posterior mean. You should also have a general grasp of the opercular flap, pectoral fin, maxillary, operculum and gill rakers. The other definitions for body parts are listed on “Definitions of Terms” found here.
Click on STEP 2!